How to Remove Objects in Photoshop: 4 Simple Ways
Looking to remove an animal, photobomber, or other unwanted objects from a picture? This guide was created to show you how to accomplish it in a few simple steps.
Photoshop includes a ton of clever tools from Adobe that make object removal simple. This includes an Object Selection tool to help you locate the person, animal, or object you want to remove and Content-Aware Fill to seamlessly fill in the empty space with details taken directly from your image so you wouldn’t even notice something was there.
In order to make your photos look distraction-free, let’s break down 4 of Photoshop’s most effective object removal techniques in this tutorial.
Table of Contents
Best Tools to Remove Anything from a Photo in Photoshop
Because of the nearby objects and the background of the image, removing objects, lines, and textures in Photoshop can be challenging. You can easily remove unwanted objects from an image without affecting the rest of it by selecting the appropriate tool.
Let’s start by talking about the Content-Aware Fill tool.
1. Content-Aware Fill
When removing something from a straightforward image, the Content-Aware Fill tool is the best choice. Artificial intelligence (AI) is used by this tool to decide how to replace the deleted pixels while maintaining a realistic appearance. Consistent textures and colors in the image are best for this tool.
When it first came out, the content-aware fill method was fairly simple and only offered the option of letting Photoshop handle everything. The workspace is a new feature in the most recent versions of the program that gives you more control when removing objects with this tool.
When you need to quickly remove something from a plain background or texture without abstract edges or patterns, this tool works best.
Pros
- Easy-to-use
- Gives you control over replacement pixels
- Intelligently replaces pixels
- Natural results
Cons
- Doesn’t work on highly complex scenes with repeating patterns
- Might create unwanted effects when used on large areas
To use this tool, open the image you wish to edit and make a note of the elements you wish to remove. In order to highlight the subject of the picture, I want to get rid of the wall’s distracting creases and lines.
Make a duplicate layer first to ensure that your editing is non-destructive. Press Control + J (Windows) or Command + J (Mac) to do this, or click and drag the background layer to the New Layer icon.
I must then choose the areas I want to replace while working on the new layer. I will need to select the lines in small groups because they are all over the wall in order to avoid overloading Photoshop and to make it simpler for the tool to locate replacement pixels.
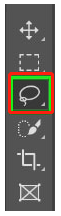
Any selection tool will be effective when using the content-aware fill to select your object. In my situation, using the lasso tool will let me quickly pick out the lines I want to delete.
Begin by choosing the area with one of the selection tools in order to remove the lines. I selected the first line I wanted to delete in this instance by using the Lasso Tool (L).
There are a few ways to use content-aware fill moving forward. Press Shift + F5 or go to Edit > Fill to quickly fill an area without having to worry about the replacement pixels.
Then, choose Content-Aware from the drop-down menu next to Contents. Press OK after choosing the fill.
Photoshop will generate pixels and fill the space automatically after deleting the selection’s contents.
While this technique might be effective for certain areas, you might need more control over the material that fills the space. You can do this in the workspace for content-aware fill. By using any of the selection tools, choose a new area of the image to delete.
Open the workspace by selecting Edit > Content-Aware Fill. You will see a few panels as soon as the workspace opens.
How to Use the Content-Aware Fill Settings
The Sampling Brush Tool, for example, allows you to choose the sample areas for the pixels that will replace the object. It is located on the far left of the screen. Use the Lasso Tool to create fresh selections in the workspace. You can move the image around with the Hand Tool and zoom in on specific areas of the image for greater accuracy with the Zoom Tool.
A green overlay covers the portions of the original image that Photoshop will use as a sample in the panel next to the toolbar. The image preview is then displayed on the right panel with the selection’s place in the image replaced by a sample of its pixels.
To give you more control while erasing portions of your image, there is a panel with additional settings on the far right.
You have control over the overlay’s display in the left-hand panel by using the section titled Sampling Area Overlay. You can choose whether the overlay shows the sampling area or the excluded area, change the color, and adjust the overlay’s opacity.
You can specify the sampling area from which you want the content’s source pixels to be drawn in the Sampling Area Options section.
- Auto: This will automatically select content similar to the surrounding fill area
- Rectangular: This will select a rectangular area around the fill area
- Custom: This lets you manually select the sampling area
- Sample All Layers: Check this box to sample source pixels using all the layers in your document
For this image, I’ll check the Sample All Layers option and use Auto.
To provide Photoshop with more information about the replacement pixels, use the Fill Settings section.
- Color Adaptation: This setting works when filling content with slight texture or color differences, and you can set this to None, Default, High, or Very High, depending on your image
- Using rotation adaptation, you can fill in the curved pattern in images that have curved objects. You can set it to None, Low, Medium, High, or Full
- Scale: By adjusting this setting, content that features repeating patterns of various sizes is corrected. Check this box if your image has a repeating pattern
- Mirror: This setting flips content for a better match, which works when the image has a horizontal symmetry
Last but not least, you can select where the modifications will be saved in the Output Settings. Set the Output To the Current Layer setting since we’ve already created a new layer and will be making several changes.
The lines on the image can be removed now that the settings are correct. Watch the preview panel to see if the pixels have been replaced correctly. Press Apply at the bottom of the right-hand panel to make the adjustment if the preview looks good with the current line selected.
Now, while still in the workspace, click on the Lasso Tool on the left and choose the following line to delete.
Select the Sampling Brush Tool to modify the overlay if it covers areas that should not be included in the sample source area. Since there is a minus sign in the center of the brush circle, sampling areas will be removed. To eliminate sample pixels, click and drag the areas.
Holding Alt (Windows) or Option (Mac) while clicking and dragging over areas allows you to expand the sample source area by more pixels. Holding Alt or Option will cause the brush circle to display a plus sign.
As you add or remove areas from the sampled pixels, the preview panel modifies to display the new pixels. When you are satisfied with the image preview, adjust the sample pixels. To make the modification, click Apply next.
Repeat these actions to remove the lines surrounding the subject and select additional areas with the Lasso Tool. Once all creases and lines have disappeared from the preview, click OK.
Your image should now be free of any undesirable elements, in my case the wall creases. If you need to remove any additional areas, you can open the Content-Aware Fill workspace at a later time.
2. the Clone Stamp Tool
An additional method for removing objects from images is the Clone Stamp Tool. When using the Clone Stamp Tool, a portion of your photo is sampled before being painted in another. When removing objects in Photoshop, this tool gives you the most control but necessitates a little more manual work.
When the replacement area’s color and tone are comparable to the sample point’s, the Clone Stamp Tool performs well. This tool will be useful if you need to remove something from a white wall. However, the Clone Stamp Tool can still function but becomes much more challenging to use if you remove an object with a complex background that has repeating patterns and textures.
Pros
- You can set the sample point
- Easy to copy or move elements
- Can remove large objects with it
Cons
- Hard to use on complex backgrounds
- Copies the exact color and tone of the sample
I’ll use the Clone Stamp Tool in this illustration to get rid of the shelf to the left of the image.
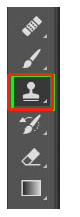
Beginning with the toolbar, choose the Clone Stamp Tool (S). Once you’ve done that, press Control + J (Windows) or Command + J (Mac) to duplicate the background layer.
You can adjust settings for your image in the top Options Bar after choosing the tool.
Clone Stamp Tool Settings Explained
The settings work as follows:
You can customize the size and hardness of the brush using the Brush Size and Hardness settings.
When removing objects from an image, you’ll probably need to adjust your brush size as you go. You can do this at the top or by pressing [to decrease the size or] to increase it.
To make it easier for the replaced pixels to blend, the brush hardness should be set to a low percentage between 0% and 10%. The only time this doesn’t apply is when cloning close to a sharp edge in the image.
How the new pixels integrate into the image depends on the blend mode. Keep this set to Normal in this instance.
How transparent the new pixels are compared to the old pixels is determined by their opacity. You should leave this at 100% to remove objects.
By calculating the speed at which the pixels emerge from the brush, the Flow determines how smooth the stroke will be. Keep this value high.
To keep the sample area’s color and tone in close proximity to the surrounding area, aligned should be double-checked to make sure it moves with your brushstrokes.
If you only want to grab pixels to sample from the layer you are on, Sample should be set to Current Layer. If you want the sample to be selected from all the visible layers, choose All Layers. If you only want to sample the layer you are currently on and the layers below the selected one, select Current & Below.
How to Use the Clone Stamp Tool in Photoshop
In order to use Photoshop’s Clone Stamp Tool, you must first choose a sample point, or the set of pixels that will be used to replace the pixels of the object you are erasing from the image. To do this, click the area you want to sample while holding down Alt (Windows) or Option (Mac). When holding Alt or Option, you’ll see a target icon show up.
To start removing the shelf, click on a portion of it. The brush circle will have a plus sign next to it when you add brush strokes by clicking or clicking and dragging. Where the new pixels are being sampled is indicated by the plus icon.
Brush over the item again and again to hide it. The sample pixels will follow your brush because Aligned is active, maintaining the tone and color of the surrounding areas.
Holding down Alt/Option while clicking on areas closer to the object, particularly those near the base on the floor, will allow you to re-sample those areas as you move down the wall.
As you remove the entire object from the image, keep resampling and adjusting the brush size.
3. the Patch Tool
The Patch Tool, which functions similarly to the Healing Brush tool, is a fantastic additional tool for object removal. If the background is more intricate, the Patch Tool is preferable for eliminating larger objects. The Patch Tool allows you to copy pixels from a different area of the image and apply them over an object.
With the Patch Tool, you can choose pixels in a specific shape to add over the object, but you’ll also need to find a spot that matches the texture and color of the background directly behind the thing you’re removing. Photoshop automatically integrates the pixels into the area to create a largely accurate result.
Pros
- Quick and easy tool to use
- You can control which replacement pixels to use
- Works well with blurred background pixels
Cons
- The blending won’t always be accurate
- Requires similar textures and colored pixels to the destination background
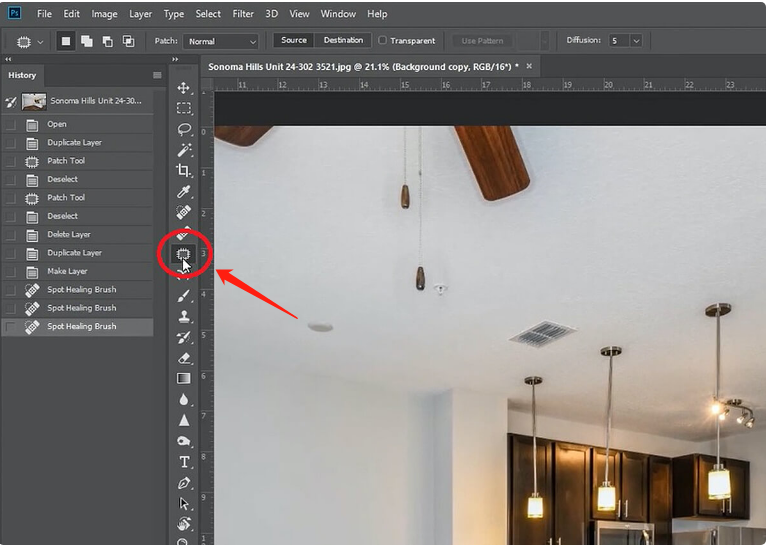
In this illustration, I’ll use the Patch Tool to take the people out of the background of the picture.
How to Use the Patch Tool in Photoshop
By clicking and holding on the Spot Healing Brush tool icon and choosing it from the options, you can access the Patch Tool from the toolbar.
If necessary, change the options in the Options Bar. The first four icons regulate the selection by (from left to right) forming a new selection, expanding the selection, decreasing the selection, or intersecting the selection.
Patch has two options that you can choose from if you want Photoshop to better blend the patch into the background: Normal patch and Content-Aware patch.
To move the selection to a different area of the image, choose Destination or Source to move the objects. By selecting the Transparent option, the new pixels will become transparent, allowing you to still see the original object through them.
To make a rough selection, click and drag the object to remove it. That will be the background family in my example.
Next, click anywhere within the selection and move the mouse pointer to the pixels you want to swap out for the object. Try to find comparable pixels because you will see the new pixels in the selection.
Photoshop will incorporate the new pixels into the selection when you release the mouse button. You might have noticed that some pixels, like the slender line of the tree, seem out of place.
To find better pixels to fill the space, simply redraw the selection to include the smaller areas that don’t look right.
You’ll have an image with the object gone once you’ve touched up the areas.
4. the Spot Healing Brush & Healing Brush Tools
By substituting the object or area with pixels from a sampled location, the Healing Tools function similarly to the Clone Stamp Tool. Though the tone and texture of the sampled pixels are combined with the new area by the healing tools to produce a more blended result.
Spots and blemishes on skin, clothing, and other surfaces are frequently removed using this tool. There are only slight differences between the outcomes produced by the Spot Healing Brush and the Healing Brush Tool.
In order to select the best replacement pixels for the area, the Spot Healing Brush uses AI to automatically select comparable pixels. Similar to the Clone Stamp Tool, the Healing Brush Tool lets you choose a sample point, and it’s useful for repairing areas that are close to the edge of the image or when the Spot Healing Tool doesn’t produce the desired outcome.
By clicking and holding the Healing Brush Tool icon (J), you can choose both tools from the toolbar.
Pros
- Quick and easy spot removal
- Easy to remove objects on a plain background
- Blends the tones and textures
Cons
- Not suitable for removing large objects
- Doesn’t work well on patterns and complex backgrounds
How to Use the Spot Healing Brush & Healing Brush in Photoshop
I’ll use the Healing Tools in this instance to get rid of the crane that’s in the background of the picture.
To accomplish this, press Control + J or Command + J on a Windows or Mac computer to duplicate the background layer. Then, press J to access the toolbar and choose the Healing Brush Tool.
The options on the Options Bar should then be modified to fit your image.
The settings work as follows:
The Brush panel’s sliders allow you to change the Brush Size and Brush Hardness. The size of the brush will depend on the object you are removing, but a softer brush will blend the pixels more effectively than a hard brush. The brush ought to be just a little bit bigger than the item you wish to remove.
Next, you can select a pattern or the sampled pixels as the Source. For artistic edits, the pattern option is the most effective.
As the brush stroke changes with the Aligned option, the sample point is automatically altered. The last step is to set Sample to All Layers, which will include pixels from every layer in the sample.
Pick a sample point that is close to the object you want to remove before you start the removal process. By holding down Alt and Option while clicking on the area, I will sample just below the skyward crane in my example.
Start by brushing over the object to remove it after choosing the sample pixels.
Continue sampling while removing the object. If you’d prefer not to sample the pixels yourself, choose the Spot Healing Brush Tool and brush over the object. For you, Photoshop will automatically sample pixels.
The crane won’t be visible in the skyline once you’ve finished painting over the item.
Conclusion: Remove Objects in Photoshop
Regardless of the kind of photography you do, you’ll find that you frequently need to remove objects from an image, whether you want to get rid of an unwanted photo bomber from your vacation photos, fix a facial blemish, or clean up unwanted litter from your street photography.
There are four different healing tools available. In various circumstances, each will perform better. These options include:
- The Content-Aware Fill Settings
- The Clone Stamp Tool
- The Patch Tool
- The Spot Healing Brush & Healing Brush Tools
The next time you are retouching images, I hope you will find this article useful in helping you get better results and streamline your workflow.


