How to Make a Photo Collage on iPhone Without App – Easy Ways
Making a photo collage on your iPhone is simpler than ever thanks to technological advancements, and you don’t even need an app! Here’s a step-by-step tutorial on how to create a photo collage on your iPhone without using an app. We’ll also demonstrate three photo collage-making apps for you.
Table of Contents
How to Make a Photo Collage on iPhone Without Using An App
Making a photo collage on your iPhone without the aid of an app is possible in a few different ways. One way is to make a collage using the built-in Photos app. Follow the steps below to create a collage using the Photos app:
- Open the Photos app, then choose the images you want to include in your collage.
- In the bottom left corner, click the Share button.
- In the bottom left corner, tap the Collage button.
- When you’re done making your collage, tap Done.
You can also use iCloud Photo Sharing to make a photo collage on your iPhone without using an app. iCloud With others who have iCloud accounts, you can share photos and albums via Photo Sharing. Follow the steps below to create a photo collage using iCloud Photo Sharing:
- Select the images for your collage by opening the Photos app.
- At the bottom left of the screen, tap the Share button.
- In the share sheet, click iCloud Photo Sharing.
Using App to Make a Photo Collage on iPhone
On this page, we will show you how to create collages using three different iPhone apps: Google Photos, Instagram Layout, and Canva. There are other ways to create collages on your phone.
Method 1: Using Google Photos

You can easily and quickly create collages with Google Photos by following a few simple steps. There are some restrictions when using the app, despite how simple it is to create a collage. You can only choose up to 9 photos to combine when using Google Photos’ collage tool, which is a drawback. Another drawback is that the Photos app automatically creates collages from the images you select; once a collage has been created, there is no way to manually reposition the photos in a grid or directly alter the grid type. This is how you can quickly make a collage with Google Photos and no additional tools.
Open Google Photos on iOS and tap the Library tab in the bottom right to create a collage.
Choose Utilities from the menu at the top of the library.
Under Create New on the following screen, select Collage.
The pictures you want to use to make a collage must now be chosen. To make your collage, you can pick anywhere between 2 and 9 photos. Tap Create in the top right corner once you’ve chosen your images.
Using a layout it deems suitable, Google Photos will now make a collage out of the photos you’ve chosen. Using the tools onscreen, you can share or alter the collage from this screen.
Method 2: Use Instagram’s Layout
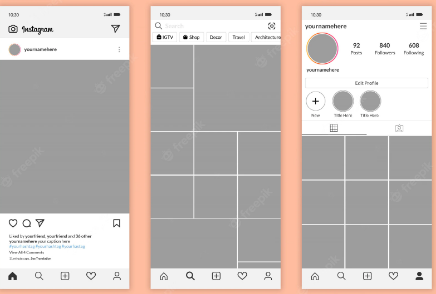
As more of us use Instagram to share our daily memories, you can use the app’s native layout tool to make collages from images you already have stored on your iPhone or take one directly using the in-app camera.
Although you can move the positions of each image, there are only six different grid types that can be used with Instagram’s tool. Additionally, you can only combine up to six images into a grid.
Add Pictures to Your Collage
To make a collage that is more unique, we, therefore, use the Layout feature of the standalone Instagram app. After downloading, launch the layout app on your iPhone and grant access to all of your photos.
All of the images that were recently saved to your iPhone are visible in the layout app. Tap Recents in the lower-left corner and select your preferred folder or album if you’d rather view and select images from a different folder or album.
You will now see every image that was saved to the chosen location. Choose the pictures you want to use in your collage. You may pick anywhere between 2 and 9 images to use in your collage.
You can see the various grids your images are arranged in at the top of the screen once you’ve selected every image.
You’ll see a different number of layouts and have a variety of layout types to choose from depending on the images you’ve chosen.
Swipe right to left in the layout row at the top to switch between different layouts.
When you locate your preferred layout, tap on it to make additional adjustments.
Edit Your Collage
You will now be taken to the app’s editing screen, where you can replace an image, add frames to your collage, and flip or mirror the images in a layout.
When you want to move a photo within the collage, tap and hold on to it and drag it to the new location.
Select a photo and drag one of its borders to the desired size to resize it in the layout. It should be noted that when an image is scaled within a layout, the adjacent images or those in the same row or column are also scaled appropriately.
Tap a picture from the grid and choose Mirror to flip it vertically.
Tap an image from the grid and choose Flip to flip it horizontally.
Choose the image you want to replace from the layout and tap Replace.
After that, choose a replacement image and tap Done. The selected image in the collage is replaced by the new one.
Tap Borders at the bottom to add borders around the collage and between individual photos.
Tap Save in the top right corner once you have finished editing the collage.
You will have more options to share the collage to Instagram, Facebook, or any other app after it is automatically saved to the library of your iPhone.
Method 3: Using Canva

You should be aware that the Canva app can be used to make collages from images on your iPhone if, like us, you use it to design headers, presentations, and posters. Canva is a great tool if you want to add text and other effects to your collage and want to get started right away. You can choose from a variety of templates.
Install the Canva app from the App Store before beginning to create a collage, and if you haven’t already, register for an account using your Google/Apple account or an email address. When you’re finished, open Canva, where you’ll find the For You screen.
Select More by swiping left on the For You tab at the top.
Choose from the selection of design options under More from Photo Collage.
The collage templates you can choose from are now displayed. Tap on the collage template you want to use after scrolling down and choosing it.
It’s important to consider how many photos you’ll be using in your collage before selecting a template, as well as whether that template has enough room for all of your photos. Select the template that you believe best fits your collage from those that have images organized in a grid to those that have text, stickers, and frames.
Canva will now ask you if you want to add photos from your library to the template when it has loaded on the screen. Tap Select More Photos from here.
Then, choose the photos from your iPhone library that you want to use to make a collage, and tap Done.
The chosen template should then appear.
By selecting the Replace option below and tapping an image from the template, you can add your own iPhone photo here.
Tap the photo you want to use for your collage in the pop-up window that appears.
Now, a copy of the chosen image will be added to the collage.
To choose and replace additional images for your collage, repeat this procedure.
By tapping the text and choosing Edit, you can edit any template that includes text and add your own caption.
If you want to alter the text’s font, choose Font while selecting the text portion from the template.
The font you want to use for the collage is then yours to select.
By tapping on a template and choosing Color from the bottom, Canva also lets you change the background of a template.
When you do this, you can select the color you want to use for the highlighted area from the colors on the canvas that are currently available, the colors that were extracted from your photos, or other common colors.
You can also alter the distance between collage elements by tapping anywhere on your design and choosing Spacing from the bottom toolbar.
Drag the slider left/right to change the grid spacing after choosing this option.
By including animations, transparency, and other effects, you can further alter the collage.
Once all of the adjustments have been made, click the Share icon in the top right corner.
Choose Download to save the collage to your iPhone in the pop-up window that appears.
For creating a collage on an iPhone, that is all there is to know.
Tips and Tricks for Making a Photo Collage on iPhone
An excellent way to display your photos and show off your creativity is to create a photo collage on your iPhone. And there are many apps available that can assist you in doing just that. However, did you know that you can create a collage without using an app?
Here are some tips and tricks for making a photo collage on your iPhone:
Use the built-in Collage tool in the Photos app:
Select the photos you want to use for your collage by opening the Photos app. Collage is selected after you tap the share button in the bottom left corner. You have a choice of using the standard layout or one of many others. Once you’re done, select a location to save your collage by tapping Done.
Use third-party apps:
There are many excellent apps available that can assist you in making stunning photo collages. PicCollage, Diptic, and Layout are a few of our favorites.
Create a grid in Photoshop:
You can make your own grid in Photoshop and then fill it with images if you’re feeling particularly inventive. The results of this technique can be truly amazing, but it does require a little more time and effort.
How to Make a Photo Collage on iPhone for Free
You probably already know that there are a ton of different photo editing apps available for the iPhone that you can use to enhance your photos. What happens, though, if you want to make a photo collage?
Thankfully, you can do this right on your iPhone by using the Photos app, which is already installed, so you don’t need to download a different app. Here’s how:
- Select the images you want to include in your collage by opening the Photos app. You may select up to nine pictures.
- In the bottom left corner of the screen, tap the Share icon.
- On the list of choices, select the Collage icon in the bottom row.
- You can alter your collage’s layout, add filters, and more by using the options at the top of the screen.
- Once you’re satisfied with your collage, select the Share icon once more and the sharing method you want to use, such as email or social media.
How to Make a Photo Collage on iPhone With Text
A photo collage can be created on an iPhone in a variety of ways. You can create collages using the built-in collage maker in Apple’s Photos app or a third-party app like Pic Collage or PicsArt.
Making a collage in the Photos app is a great alternative to using an app. Just open the app and tap on the “+” sign in the top-left corner. Then, tap on “Add photos,” and select the photos you want to use. Once you’ve selected all of the photos you want to use, tap on “Done.”
Next, tap on the “Texture” button in the bottom-right corner. You can pick from a variety of background textures in this case, like wood or stone. Once you’ve selected a texture, tap on “Done.”
Now, tap on the “Layout” button in the bottom-right corner. Here, you can select your collage’s layout from a variety of options. Once you’ve found a layout you like, tap on “Done.”
Finally, tap on the “Text” button in the bottom-right corner to add text to your collage. You can type in any text you want to appear in your collage here. When you’re finished adding text, tap on “Done.”
Your collage is now finished. To save it to your iPhone, tap on the “Share” button in the top-right corner and select “Save Image.”
How to Make a Photo Collage on IPhone With Music
Making a photo collage on your iPhone can be done in a few different ways. Using an app like Pic Collage or Diptych is one common technique. Choosing photos, including music, and sharing your collage with friends and family are all made simple by these apps.
You can also use iOS’s built-in photo collage feature. This strategy necessitates a little bit more work but doesn’t call for any additional apps. Here’s how to do it:
- Select the images for your collage by opening the Photos app.
- Next, select Create Collage by tapping the Share button.
- Then, tap Done after selecting the images you wish to use.
- After deciding whether you want your collage to be square or rectangular, tap Done.
- Pressing the Aa button in the top-right corner of the screen will allow you to add text, stickers, and other effects.
- To share your collage with others after finishing, tap Done and then tap Share.
How to Make a Photo Collage on iPhone With Video
Memoji, which are customizable Animoji that you can use to send amusing messages to your friends and family, is a new feature that Apple introduced with iOS 12. Apple also unveiled a new feature called Clips in addition to Memoji, which enables you to make entertaining video collages out of your photos and videos.
We’ll demonstrate in this article how to use Clips on your iPhone to create a photo collage. We’ll also demonstrate some techniques for making the ideal collage.
- your iPhone’s Clips app should be opened.
- Tap the “+” button in the top-left corner of the screen.
- The images and videos you want to include in your collage should be chosen.
- Tap the “Create” button in the bottom-right corner of the screen.
- Tap on each component of your collage to edit it by selecting an alternative.
- Tap the “Done” button in the top-right corner of the screen when you’re finished editing your collage
Tips for Making a Photo Collage on Your iPhone
Remember that a photo collage is more than just a collection of random images when using these apps. Instead, you should use the images to illustrate a narrative or a certain point.
For best results, keep these tips in mind to make an outstanding photo collage that people will love:
- Utilize the burst mode to take a series of pictures, which you can then use in your collage.
- Using your photo collage as the backdrop for your story, tell it from beginning to end.
- For your photo collage, pick images with similar hues or textures.
- To give the viewer a sense of contrast, combine images of nearby and faraway scenes.
While the three photo collage apps are excellent options, there are a ton more available that you can explore if you like.
Choose the one that appeals to you the most and stick with it because they all have different features and options. You can easily switch them up or try a few different ones because the majority are either free or very reasonably priced; hopefully, this will result in you creating a few excellent photo collages.